Make These 2 Backpack DIYs for the Best Back-to-School Season
It has returned to-educational season, and the main thing that is at the forefront of my thoughts (other than summer work… ) is purchasing the cutest school supplies! I think we would all be able to state that we've invested HOURS strolling here and there the paths of stores (and significantly additional time perusing internet) hunting down the ideal pens, covers, and, in particular, a definitive rucksack. In any case, very frequently, nothing has that specific *oomph* that shouts "me!" The arrangement? DIY, obviously! I will indicate both of you diverse approaches to patch up your knapsack to make it absolutely useful and absolutely you.

continuously has your back. How about we go!

Materials and Tools:
- knapsack (you can upcycle an old rucksack for this!)
- yarn
- felt
- weaving floss
- weaving needle
- Fabri-tac (or other texture stick)
- scissors
- pencil
Tufts + 'POMS BACKPACK


To start with, take your yarn and begin preparing by making the pom-poms. In spite of the fact that I utilized my hands to make these, a book works the same for this venture. Ace tip: Less yarn implies littler pom-poms!

Try not to put the yarn down yet! Utilize it to prep your decorations also. Since we cherish tufts so much, it's nothing unexpected we've made them some time recently. Look at our tufts instructional exercise here!

To fasten on the decorations, first string your weaving needle with a bit of weaving floss. Fasten from within the pack and through the yarn circles of the tuft. Force the needle down back through the knapsack and keep weaving in a circling movement, another two times. To complete, utilize your needle and the additional bit of floss underneath the sack (from the earliest starting point) to tie a twofold bunch. Trim with scissors and rehash.

Here's the simple part: joining the pom-poms! Put texture stick where you need the pom-pom to go, and promptly put it there. Apply weight to ensure everything dries set up.
FELT "PATCHPACK"
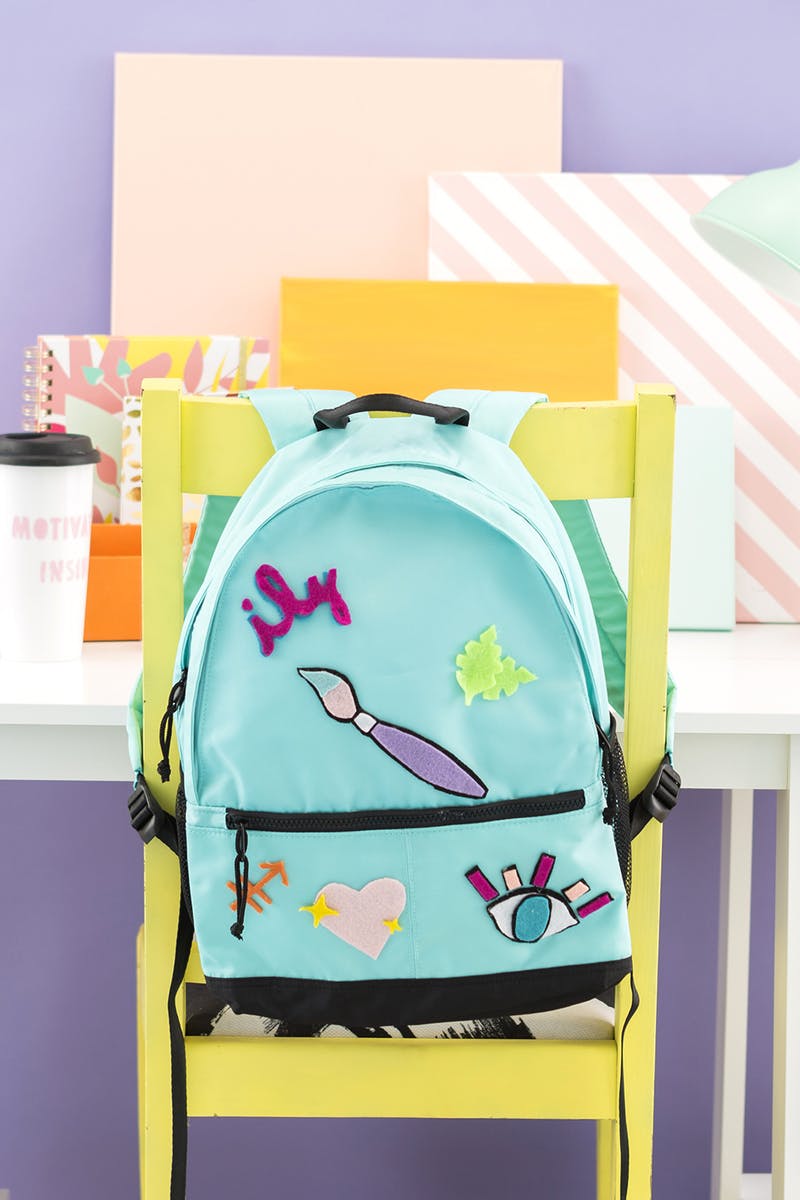

Make your patches by outlining your plan onto a bit of felt with your pencil. Have a go at making your shapes somewhat greater than you need them.

Painstakingly cut out your outline. Here's the place drawing it greater proves to be useful: Cut within the outlined lines to wind up with impeccably measured shapes instead of something too little. Try not to stress if there's still some pencil; quite recently flip your fix over for sans line felt.

Utilize your texture paste to follow the greater part of your felt sorts out to make your fix. Keep in mind to apply weight to ensure it sticks before giving it a chance to rest and dry! Rehash until all your patches are finished.

Admission: I can't get enough of the sparkly heart emoji.

Paste fixes on knapsack with texture stick. Place them wherever you'd like on the rucksack, and apply weight to ensure they stick.

The best of the two universes.

Regardless of whether you're even more a patches or tufts and pom-poms sort of individual, both of these DIYs can enable you to flaunt the best of your identity without giving up your financial plan!

Prepared for class! Espresso, organizer, and everything in the middle.

Study pals!

Obviously, school isn't constantly!

Creator: Sophie Gilbert
DIY Production and Styling: Sophie Gilbert
Photography: Chris and Kurt Andre.
source:brit.co by:Irene Lee

